


 5 / 8
5 / 8

110 VOLT TRANSFER
SWITCH INSTALATION
November 6, 2017
Page
5
of
8
BC Ambulance Service, Fleet Operations
1 877 652-7465
Block C, 2261 Keating X Road
Fax: 250 952-0275
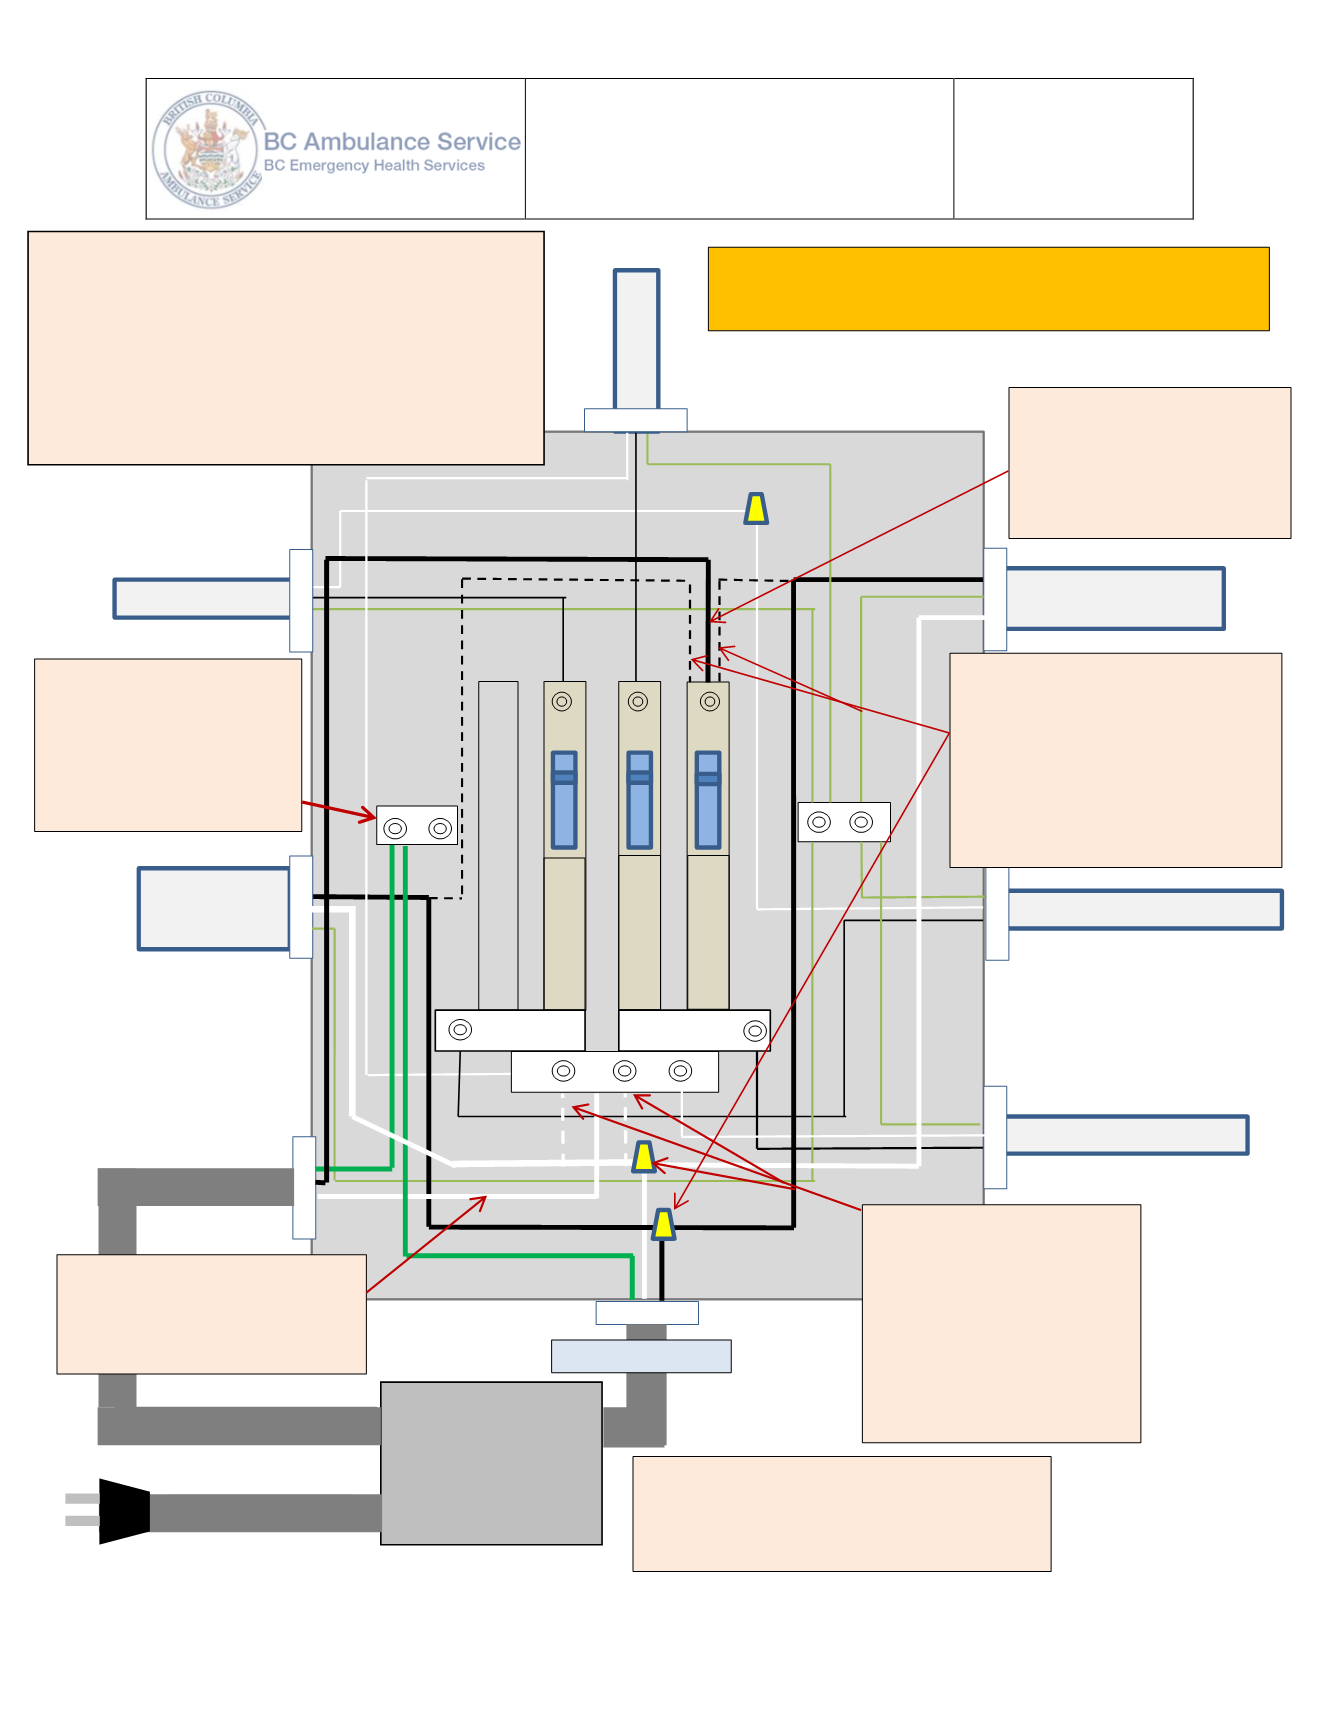
FROM UPPER SHORELINE PLUG
TO PATIENT COMPARTMENT
FRONT 110v RECEPTICAL
TO BATTERY CHARGER
TO RIGHT REAR
COMPARTMENT
110v RECEPTICAL
H
E
A
T
E
R
FROM LOWER SHORELINE PLUG
C
H
A
R
G
E
R
H
E
A
T
E
R
O
U
T
L
E
T
S
PROwatt SW
TRANSFER SWITCH
CONNECT TO AC LOAD
STEP 4
INTERNAL WIRING CONNECTIONS
Follow the numbered steps in order.
Note: The dashed lines show the original wire
path. The faded lines show the wiring not
disturbed by this modification.
1
.
Attach the 2 green
wires from the transfer
switch harnesses to the
supplied bus bar & attach
to the breaker box.
2
.
Remove the 2 black wires
from the 110v breaker and
connect them to the black wire
from the transfer switch
“Connect to Load” harness using
the supplied Marret.
3.
Connect the black wire
from the transfer switch
harness “AC Source Power”
to the breaker.
4.
Remove the two 110v
receptacle white wires
from the neutral bus &
connect to the white wire
from “Connect to AC Load”
harness with the supplied
Marret.
5.
Connect the white wire
from the “AC Source Power”
harness to the neutral bus bar.
6
.
Plug the “Connect to Inverter” wire into
the 110V outlet on the Go Power Inverter.
Leave the existing power cord plugged in.
CONNECT TO AC SOURCE POWER
CONNECT TO INVERTER
Twist all wire connections before Marrets are
installed, then wrap with electricians tape.