


 3 / 3
3 / 3
APPLICATION
1.
Clean the surface area – don’t use Windex; it
leaves a film. Use a few drops of dishwashing
liquid in water, and spray or sponge it onto the
vehicle. Wipe it off with paper towel.
2. Use the tape measure and wax pencil to mark
where the decal will be applied, centering it as
appropriate, and ensuring that it’s level. Mark
where the top of the decal should be, and where
the center of the decal should be, and put a mark
on the center of the decal too.
3. Use the painter’s tape to temporarily attach the
decal to the vehicle surface, lining it up with your
penciled ‘top’ line and ‘center’ line.
4. Use a long piece of painter’s tape to ‘hinge’ the
decal across the middle. Now you can remove
the temporary tape from half of the decal.
5. Peel that half of the decal away from its backing,
and let it drop over the tape hinge. Use your
knife to slice through the backing, and remove
that half of the backing.
6. Carefully lift up the sticky part and apply it from
the hinge out, holding the squeegee at a bit of an
angle and using diagonal strokes to work the air
out as you go. Don’t press too hard. Smooth the
edges out.
7. Now remove the hinging tape and the temporary
tape on the other half of the decal.
8. Lift the other half of the decal away, and peel
off the backing paper as you squeegee the
remaining sticky side onto the vehicle. Again,
smooth the edges out.
9. Use a bit more soapy water to clean off the wax
pencil marks, and you’re done!
TROUBLESHOOTING
If the decal starts to stick in the wrong area while you’re applying it, pull it back quickly and assertively; don’t
try to peel it off slowly or it will stretch. Then reapply.
If you notice an air bubble after you’ve applied the decal you can try using the squeegee or credit card to
ease it out. You may have to use your knife to cut a slit in the decal below the bubble, and ease the air out
through the slit.
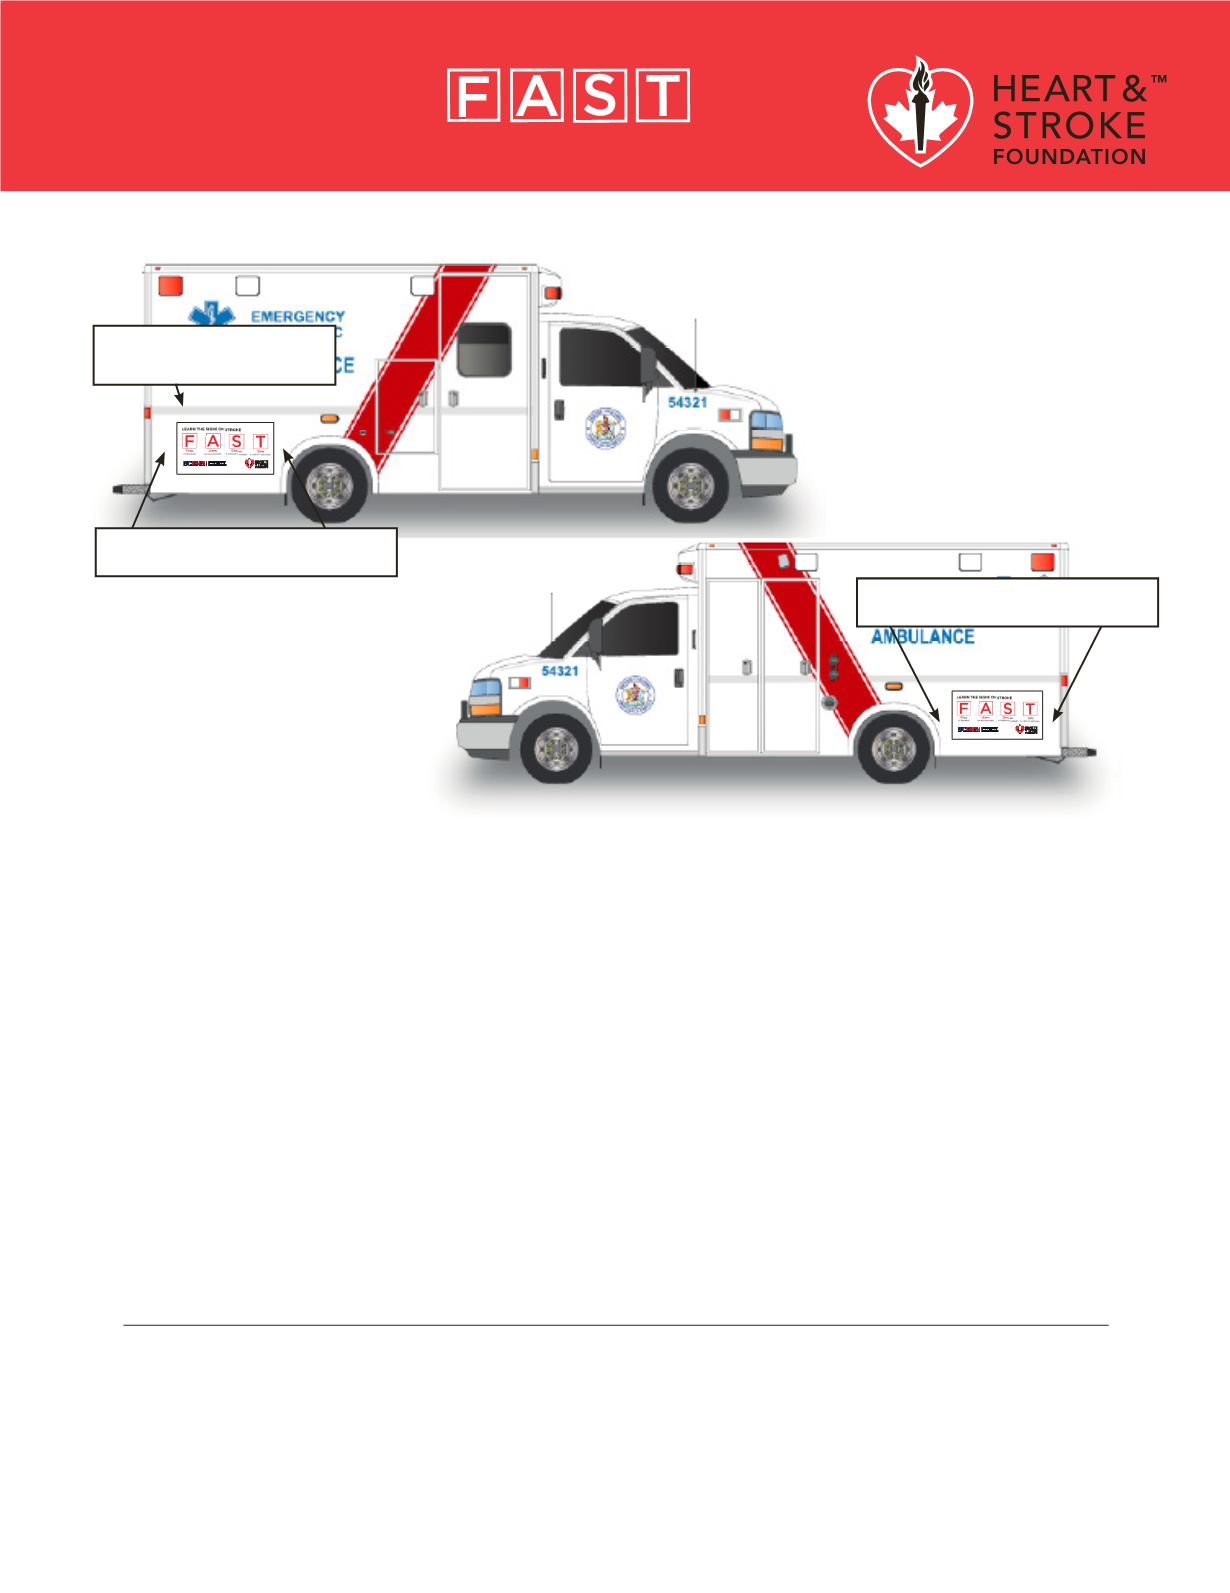
HOW TO APPLY
DECALS TO YOUR AMBULANCE.
INSTALL APPROX 2”
BELOW LINE
CENTRE DECAL ON PANEL
CENTRE DECAL ON PANEL