


STRYKER BATTERY
CHARGER INSTALATION
September 26,
2017
Page
1
of
1
AMBULANCE TYPE:
CRESTLINE
UNITS AFFECTED:
ALL UNITS EQUIPPED WITH THE STRYKER POWERPRO
STRETCHER
ACTION:
INSTALLATION OF THE STRYKER POWERPRO BATTERY CHARGER
LABOUR TIME:
.
3 HRS
BILL TO: BCAS
SERVICE PROCEDURE:
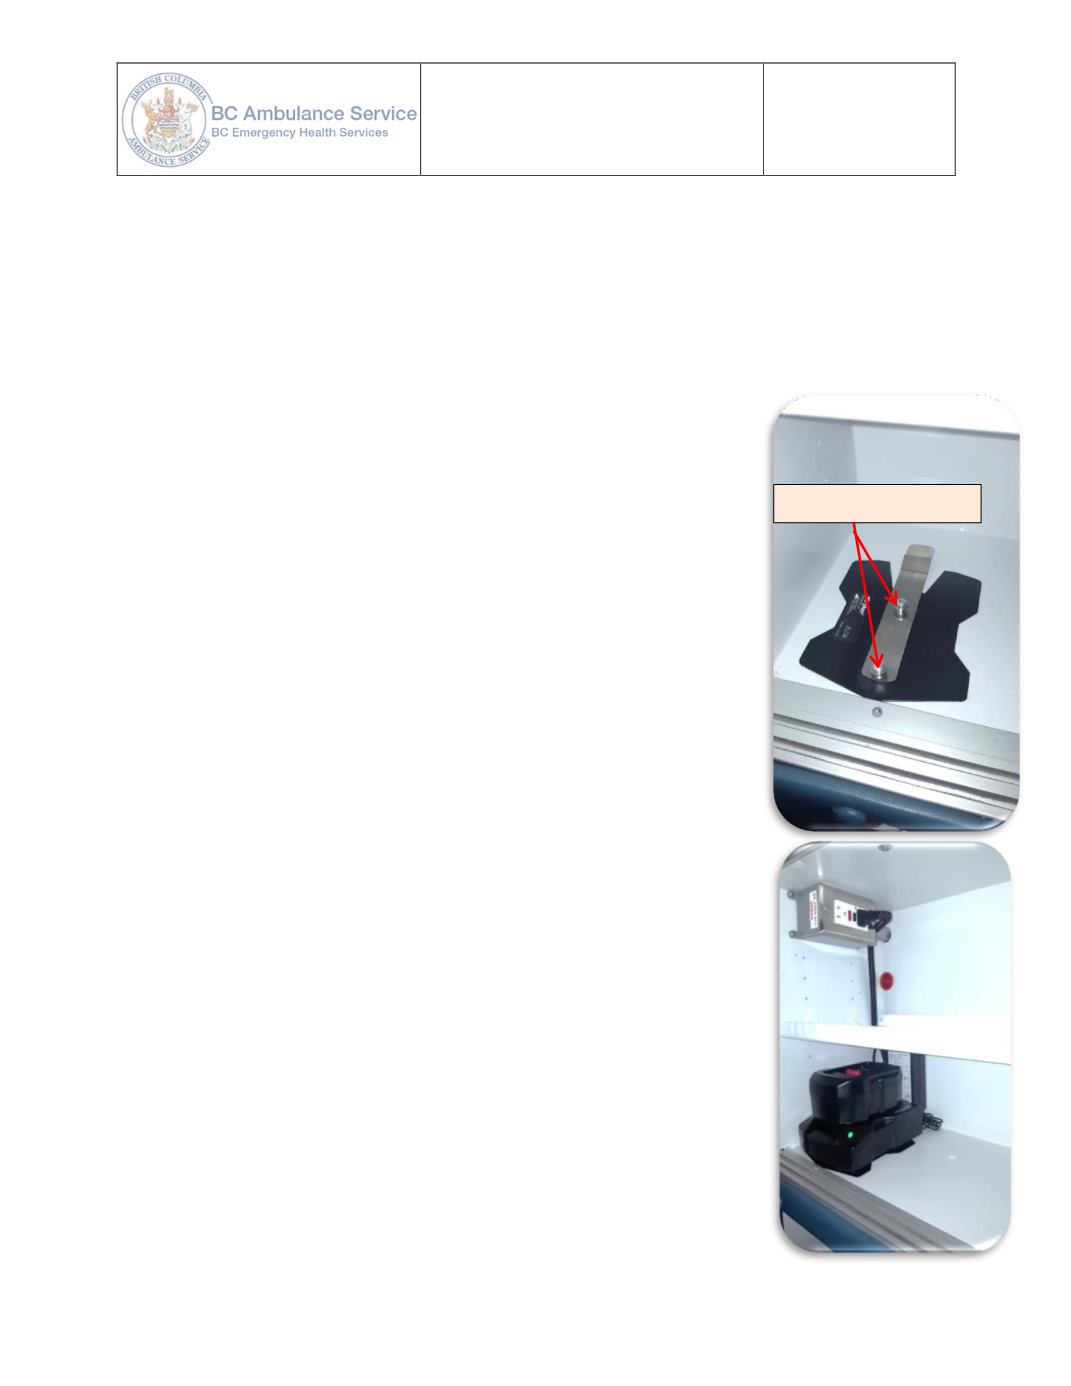
1. Remove the storage bins to provide space to mount the
Charger on the left of the lower shelf located in the cabinet
above the suction unit.
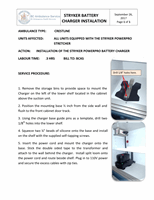
2. Position the mounting base ½ inch from the side wall and
flush to the front cabinet door track.
3. Using the charger base guide pins as a template, drill two
1/8
th
holes into the lower shelf.
4. Squeeze two ¼” beads of silicone onto the base and install
on the shelf with the supplied self-tapping screws.
5. Insert the power cord and mount the charger onto the
base. Stick the double sided tape to the transformer and
attach to the wall behind the charger. Install split loom onto
the power cord and route beside shelf. Plug in to 110V power
and secure the excess cables with zip ties.
Drill 1/8” holes here.