COMPONENTACCESSANDREMOVALPROCEDURE
CONSOLE
-To access the back of the console or to remove it for engine service you need to remove
the two #10 truss headmachine screws from the sides of the console that are fastenedwith
nutserts to the engine cover. After the screws are removed you simply pull the console off the
engine cover as it is now only being heldwith velcro and a clip on the bottom. To remove engine
cover youmust first remove the passenger seat and place the console towards the driver’s side,
the floor harness cover doesn’t have to be removed to achieve this.
- Reverse this procedure for reassembly taking special care not to cross thread the
mounting screws into the nutserts.
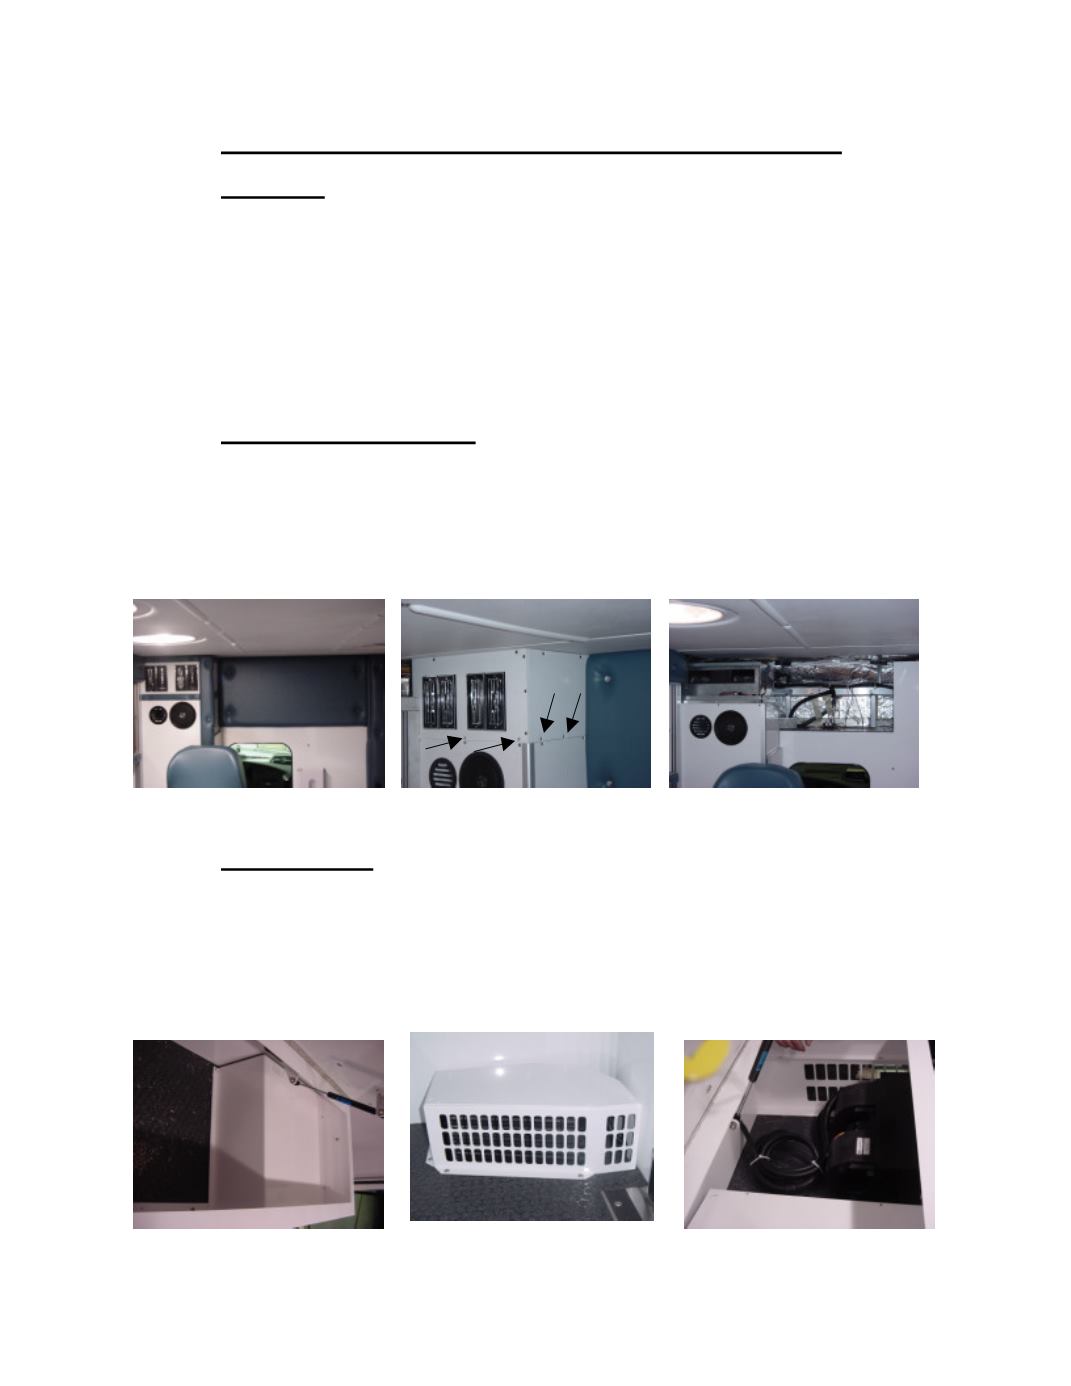
REARAIRCONDITIONER
- Remove the five (5) screws holding the bulkhead cushion into place, (fig. 1) the fifth
screw being the center cab headliner screw.
- Remove the eight screws securing the upholstery trim around the a/c face. (fig. 1)
- Remove the four screws that secure the intecel cover, (fig. 2) to expose the air
conditioner (fig. 3)
- Reverse this procedure for re-assembly.
Fig. 1,
Fig. 2
Fig 3
REARHEATER
- for single cot units remove the four (4) screws that secure the heater cover. (fig. 4 )
- for dual cot units remove the four (4) screws that secure the heater cover. (fig. 5)
- remove the cover to expose the heater, hose loop, etc. (fig. 6)
- To remove heater totally from vehicle youmust first remove the four (4) screws that
secure the heater to the floor. Before removing hoses from the heater youmust clamp off
the heater hoses to prevent excess coolant loss.
- Reverse this procedure for reassembly
Fig. 4
Fig. 5
Fig. 6


